

Scissor Mole Traps: How to Choose and Set One Correctly
To use scissor mole traps correctly, buy a sturdy galvanized trap, find a runway the mole still uses, and dig out a small section of it. Seat the trap so its jaws straddle the tunnel, cover the hole to block light, and check it every day. Placement decides the result far more than brand does. A well-set trap can catch a mole within a day or two, while a trap in a dead tunnel catches nothing for weeks.
The problem is that moles give you almost no feedback. You see fresh mounds, buy a trap, push it into the nearest hump, and wait. A week later the lawn looks worse, the trap is empty, and you decide the trap is junk. Usually the mole never used that tunnel, or a gap let light and air in and the mole plugged the tunnel somewhere else.
This guide walks you through the job in order. You will learn how a scissor trap works and what you need, how to buy a good one, how to find an active runway, how to set the trap, and how to check it and know when to stop. Mole Masters has done nothing but mole control in the Pacific Northwest since 1991, so the advice comes from what we see in yards around Seattle, Tacoma and the Puget Sound.
How scissor mole traps work and what you need
A scissor trap is a spring-loaded trap with two sets of jaws and a trigger pan between them. You set it, place it in a tunnel, and the mole trips it by doing what it already does: repairing its tunnel. Knowing this makes every later step make sense.
How the trap fires
A catch holds the jaws open when the trap is set. The jaws sit on either side of the trigger, and the pan sits across the mole's path. When the mole pushes up on the pan to fix the disturbed tunnel, the catch releases and the jaws scissor shut from both sides . The Victor Out-of-Sight is one well-known example of this design, and most galvanized steel versions sold in two-packs follow the same pattern.
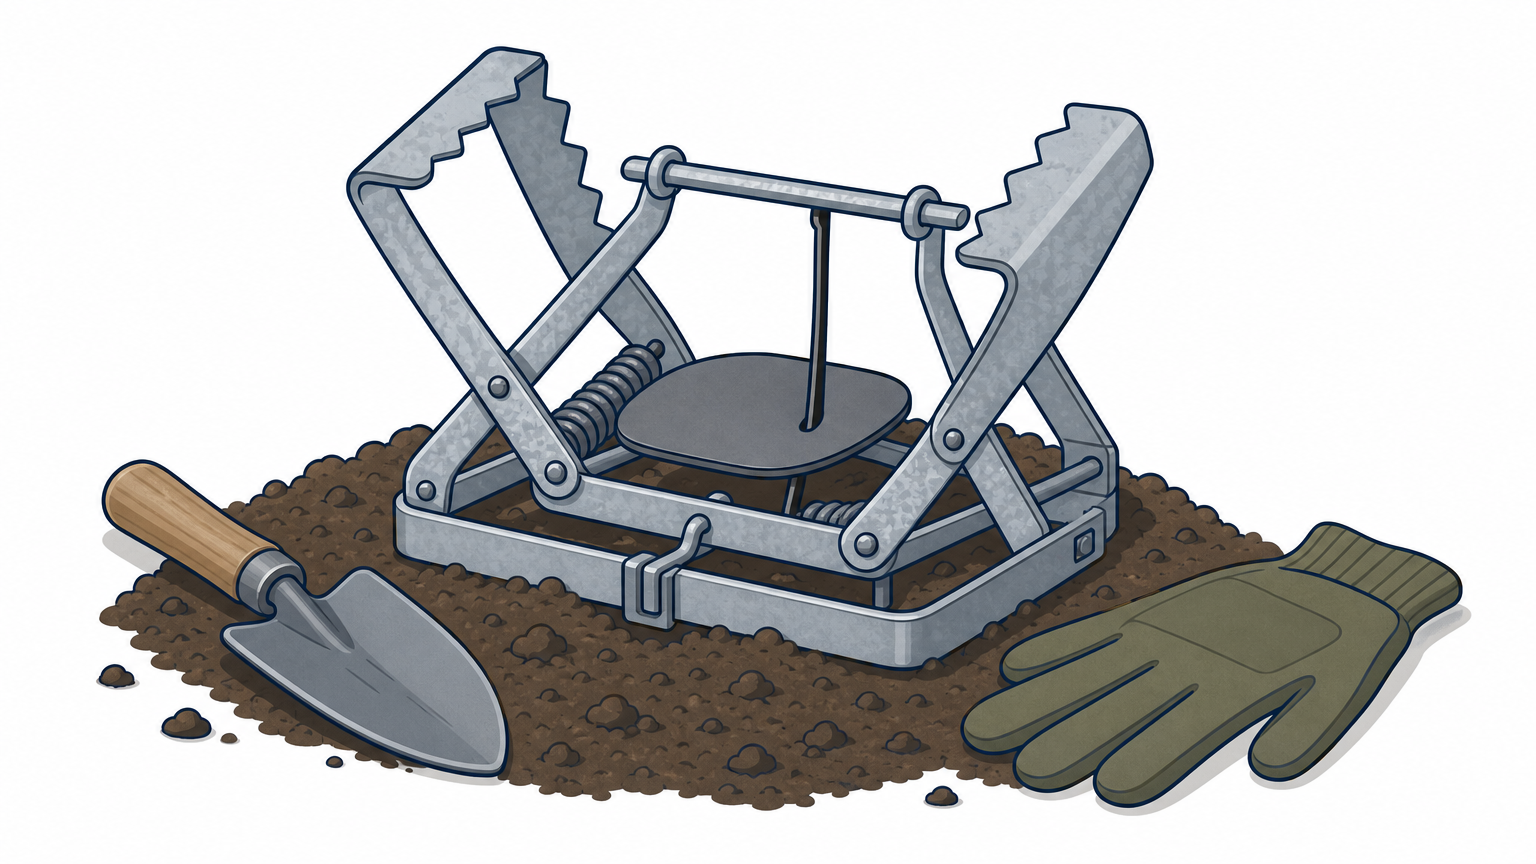
Moles treat any hole or gap in a runway as damage and rush to plug it. A scissor trap uses that habit , so it needs no bait. The mole is not lured by food, it is simply doing its normal work.
How effective they are
Scissor traps are effective when set in an active main runway and unreliable when they are not. They are reusable, which is why they are the most common do-it-yourself tool for moles. They are not instant, though. Expect to move a trap or two before you catch anything, and expect new moles to move in later if your soil is full of earthworms and grubs.
Gear checklist
You do not need much:
- Two or more scissor traps
- Work gloves, which keep your scent off the trap
- A trowel or small spade
- A probe, such as a long screwdriver or thin metal rod
- Marker flags
- A bucket or flat board, plus a rock to hold it down
Treat the trap like a mousetrap with far more force. Never set it with your hand over the jaws, and keep children and pets away from the area until the trap is covered.
A scissor trap works with the mole's habit of repairing its tunnel, so your job is to put it where the mole actually travels.
Step 1. Buy a trap that will hold up
Buy a rust-resistant steel trap with a firm spring and a smooth trigger, and buy more than one. The trap lives in damp soil, so cheap metal and sticky triggers fail first.
What to check before you buy
Use this table when you compare listings:
| Feature | What to look for | Why it matters |
|---|---|---|
| Material | Galvanized or coated steel | Rust slows the jaws and trigger in wet soil |
| Spring | Firm tension that closes the jaws fully | A weak spring lets a mole back out |
| Trigger pan | Moves freely with light pressure | A sticky pan means a missed catch |
| Set mechanism | A catch you can set without your fingers near the jaws | Prevents injuries to you |
| Instructions | A clear diagram for placement | Models differ in how the jaws sit |
| Reusability | Can be reset many times | One trap can work several spots |
How many to buy
Plan on one trap per active runway, plus a spare . For example, a quarter-acre lawn with two active runways and one ridge along a fence needs three traps in the ground and one in reserve, so you order four. A retail two-pack suits a small yard. Bulk packs of a dozen exist, but they are aimed at professionals and are overkill for most homeowners.
Buy for build quality and count, because a trap that rusts or sticks costs you more time than the price difference saves.
Step 2. Find an active runway
Trap a main runway that the mole uses repeatedly, and confirm it is active before you dig. This step is where most do-it-yourself attempts fail.
Main runways versus surface ridges
Main runways are the tunnels moles travel again and again between their nest and feeding areas. They often run in fairly straight lines along fences , walkways, foundations and garden edges. Surface ridges are the raised, wandering lines of feeding tunnels, and a mole may use one once and never return. The mound of dirt itself is spoil pushed out of a deeper tunnel, so it is a poor spot for a trap.
The stomp test
Follow these steps to separate live tunnels from abandoned ones:
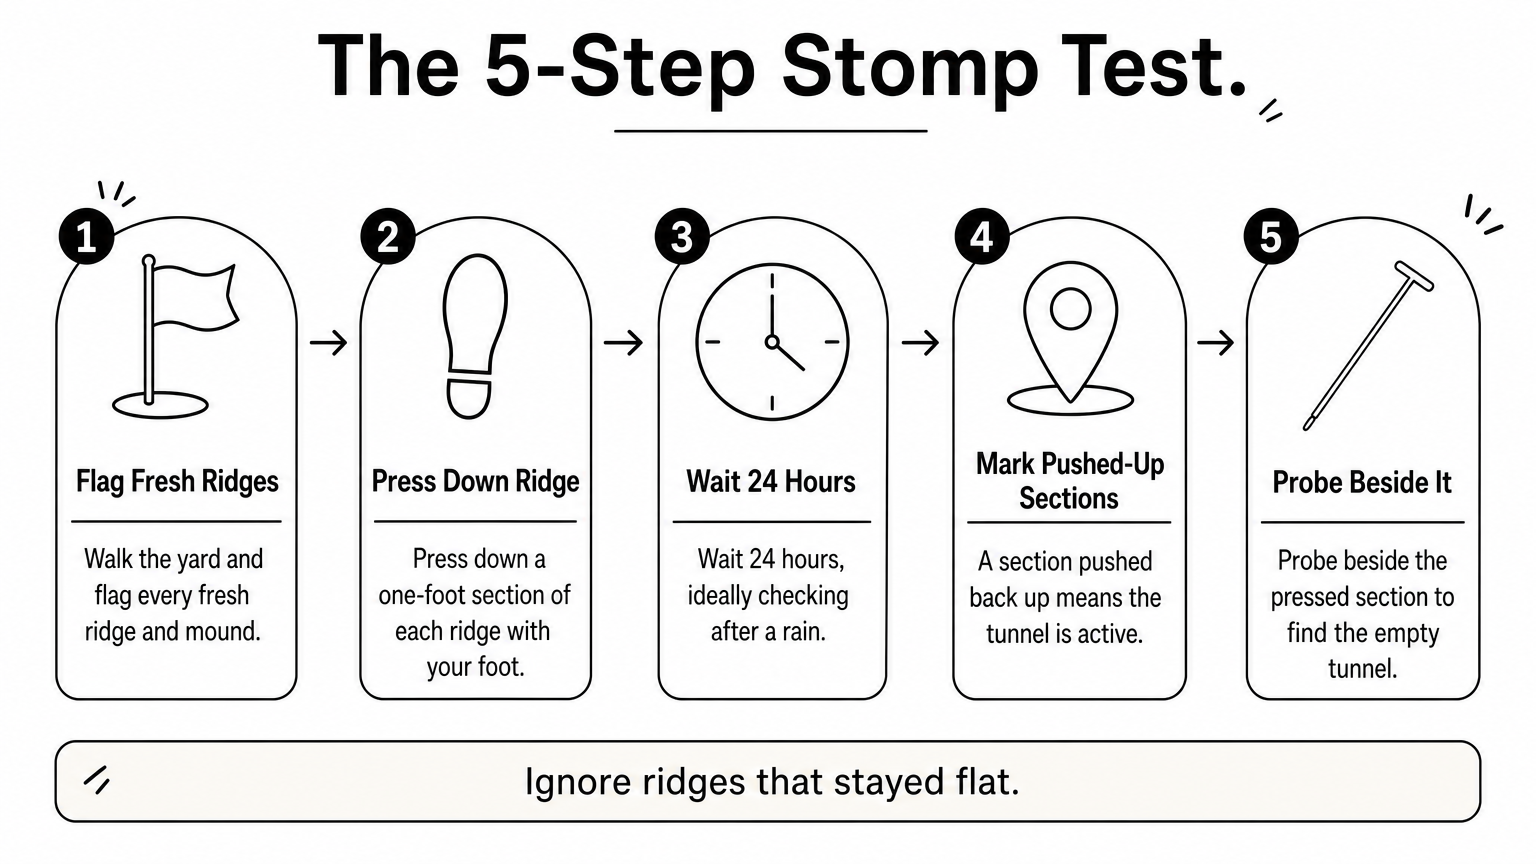
- Walk the yard and flag every fresh ridge and mound.
- Press down a one-foot section of each ridge with your foot.
- Wait 24 hours. In the wet soil of the Puget Sound region, checking after a rain makes new work easy to spot.
- Mark every section that has been pushed back up. That tunnel is active.
- Push your probe into the soil beside the pressed section. When it drops through resistance into an empty channel, you have found the tunnel.
Ignore ridges that stayed flat. A mole has not touched them, and a trap there will sit unused.
A tunnel the mole rebuilds within a day is a tunnel worth trapping.
Step 3. Set the trap in the tunnel
Set the trap with your gloves on, seat it so the jaws straddle the tunnel, and seal out light and gaps . The exact jaw layout varies by model, so keep the diagram from your trap in hand.
Set and place the trap
- Put on gloves. Use the probe to confirm the tunnel, then dig out a trap-width section of the runway with your trowel.
- Clear loose soil so the bed is flat and the tunnel line is open on both sides.
- Away from the hole, spread the jaws and engage the catch, keeping your fingers clear.
- Lower the trap into the opening so the jaws sit in the tunnel on either side and the trigger pan lies across the tunnel line.
- Pack soil around the trap without letting any fall onto the pan. If your trap has a hole for a cord, tie it to a stake or flag so you can retrieve it.
- Cover the hole with a bucket or board and weigh it down with a rock to block daylight. Mark the spot with a flag.
Seal every gap and block the light, because a mole that senses an opening may plug the tunnel from a spot your trap does not cover.
Mistakes that cost you a catch
The first mistake is setting in a dead tunnel , which the stomp test prevents. The second is leaving gaps beside the jaws, which lets the mole dig around the trap. A third is thinking you need bait. Moles eat earthworms and grubs, not vegetables or peanut butter, so skip bait and put your effort into placement.
Scent is the last one. Bare hands leave human odor on metal that a mole may notice, so wear gloves from the moment you pick the trap up.
Step 4. Check, move, or call a pro
Check each trap at least once a day, reset it if it fired, and move it if nothing happens in two to three days. Consistent checks are what turn a good setup into a result.
Check the trap every day
Lift the cover in the morning. If the trap has fired and caught a mole, wear gloves, remove it, and reset the trap in the same runway, since other moles may use it. If the trap has fired and is empty, reset it and re-check the seal. If it has not been touched after two or three days, dig it up and move it to another active runway. A trap that sits untouched is telling you the tunnel is not in use.
When to bring in a professional
If you have moved traps several times and the ridges keep coming, the mole may be using tunnels you have not found, or there may be more than one. That is when many of our customers call us, often after trying store products, poisons or bait. We control moles with underground devices and no poisons or chemicals , so the method stays safe around kids and pets.
Our In/Out Mole Control is built for an active problem. It is five weekly visits, with an "Up-To" price of $395 for a half-acre property or smaller, before sales tax. The average client spends $345, and the price drops on a sliding scale if we can pull out early. Estimates are free.
If three or four well-placed traps catch nothing over a week, stop guessing and have someone read the tunnels for you.
Set it right, then check it daily
A scissor trap works when you put it in a tunnel the mole is actively using, seal the hole, and check it every day. Buy a solid galvanized trap, buy a few, test your ridges with the stomp test, and skip the bait. Move any trap that sits untouched for a few days.
If your lawn keeps heaving anyway, you do not have to keep digging. You can request a free mole control estimate from Mole Masters in the Seattle, Tacoma and Puget Sound area, and we will tell you what the yard needs.