

Setting Mole Traps: Scissor, Harpoon and Tunnel Traps
Successful mole traps setting comes down to three things. Put the trap in a run the mole is still using, seat the trigger in the exact path of the mole, and check the trap every day. Scissor, harpoon and tunnel traps each have their own set sequence, but all three fail for the same reasons: a dead run or a crooked trap.
Most failed trapping starts with a rushed first step. You push a trap into the first ridge you see, walk away, and find fresh mounds ten feet over the next morning. Moles abandon surface tunnels quickly, and a trap in an abandoned run catches nothing, however well it is set.
This guide covers setting mole traps in four steps: finding an active run, setting each of the three trap types, checking and moving traps, and fixing a trap that keeps missing. Mole Masters has done nothing but remove moles around Seattle and Tacoma since 1991, and the advice below comes from that work.
What to know before you set a mole trap
Three choices decide most results before you touch a trap: the type you use, the timing, and how you protect people and pets. Settle these first.
Pick the trap type
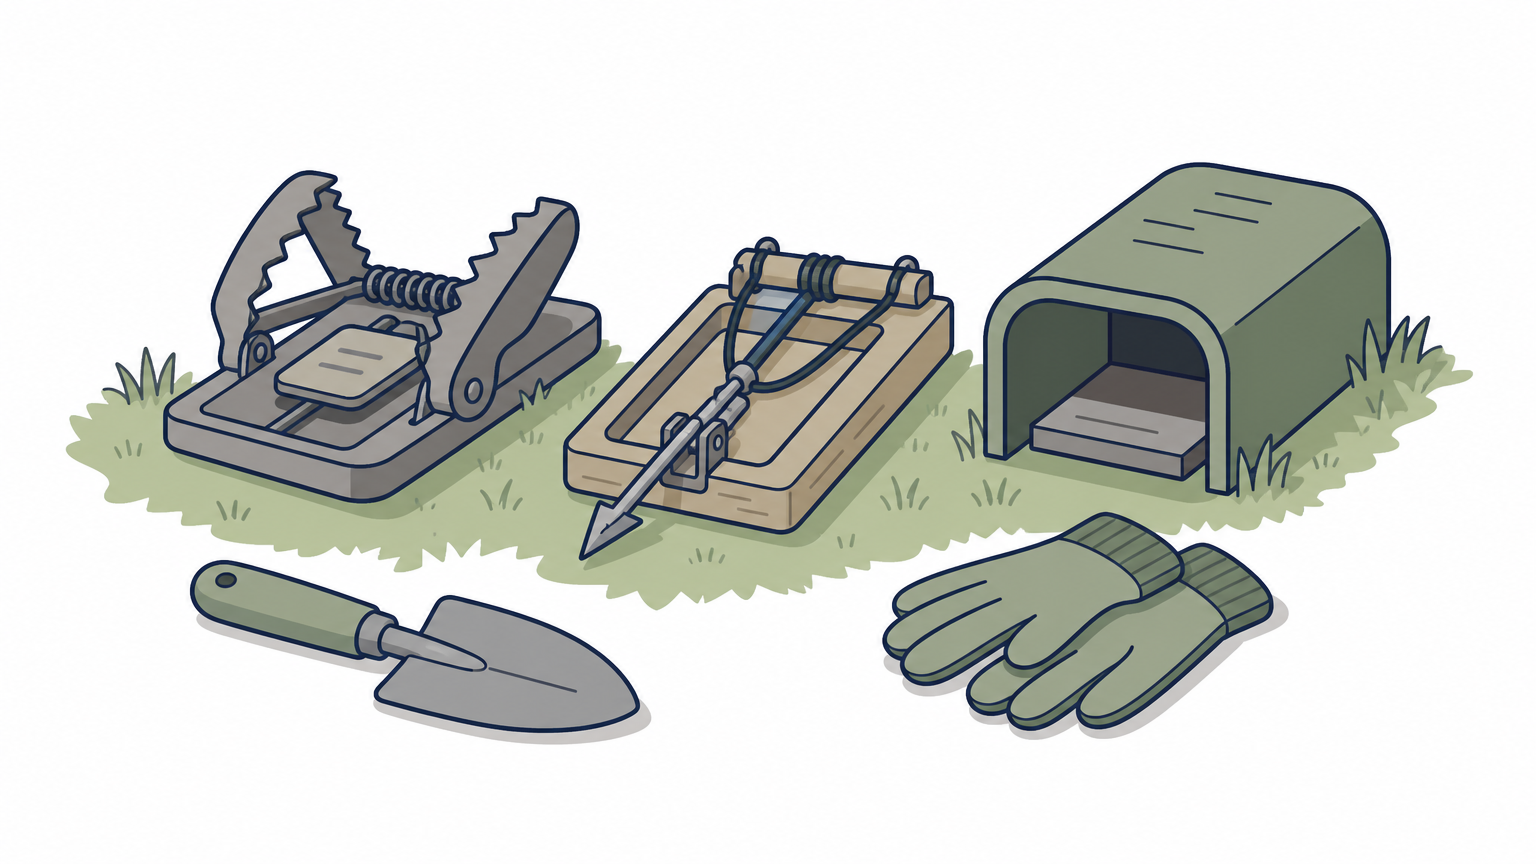
All three common types work, so choose the one you can set cleanly. Scissor traps are the fastest to set, harpoon traps need little digging, and tunnel traps take the most work. Homemade pitfall traps, such as a jar sunk into a run, can catch a mole but are less reliable, so this guide sticks to purpose-built traps.
| Trap | How it works | Setup effort |
|---|---|---|
| Scissor | Two sets of scissor jaws sit in the run and close on the mole as it pushes through | Low, set in seconds once the jaws are in the ground |
| Harpoon | Spring-driven spikes drive down through the run when the mole pushes up on a trigger pan | Medium, little digging but exact placement |
| Tunnel | The mole walks into a channel or tube and trips a trigger that closes the jaws or choker | Higher, you open the run and cover it |
Time it around rain
The best time to set traps is right before or right after a soaking rain. Wet soil draws earthworms up, moles follow them, and surface runs stay intact long enough to trap. In the Puget Sound region, fall through spring gives you that rain, and moles shift to new ground as seasons change , so early trapping protects the lawn. In dry or sandy soil, tunnels collapse. Irrigate first , then set traps on the new activity.
Set your traps on fresh activity in damp ground, because dead runs in dry soil catch nothing.
Gather gear and stay safe
You need a short list of tools:
- Clean gloves, to keep human scent off the trap
- A probe or long screwdriver
- A trowel
- Marking flags
- A board or bucket to block light
- The maker's instructions for your trap
Never set a trap by hand in the air. Set it only with the jaws or spikes in position, following the instructions. Keep children and pets away , and flag every trap so nobody steps on one.
Step 1. Find an active run
An active run is a tunnel the mole rebuilds within about a day after you flatten it, and only those runs are worth a trap. Spend your time here, because this step decides whether the next one matters.
Read the lawn
Start with fresh mounds and raised ridges. The best spots are straight stretches between two mounds and runs that follow a fence line, sidewalk or driveway edge, because moles travel along firm barriers again and again. Skip short, wandering ridges. They are usually one-time feeding tunnels that the mole never uses again.
Run the flatten test
Test each candidate before you commit a trap:
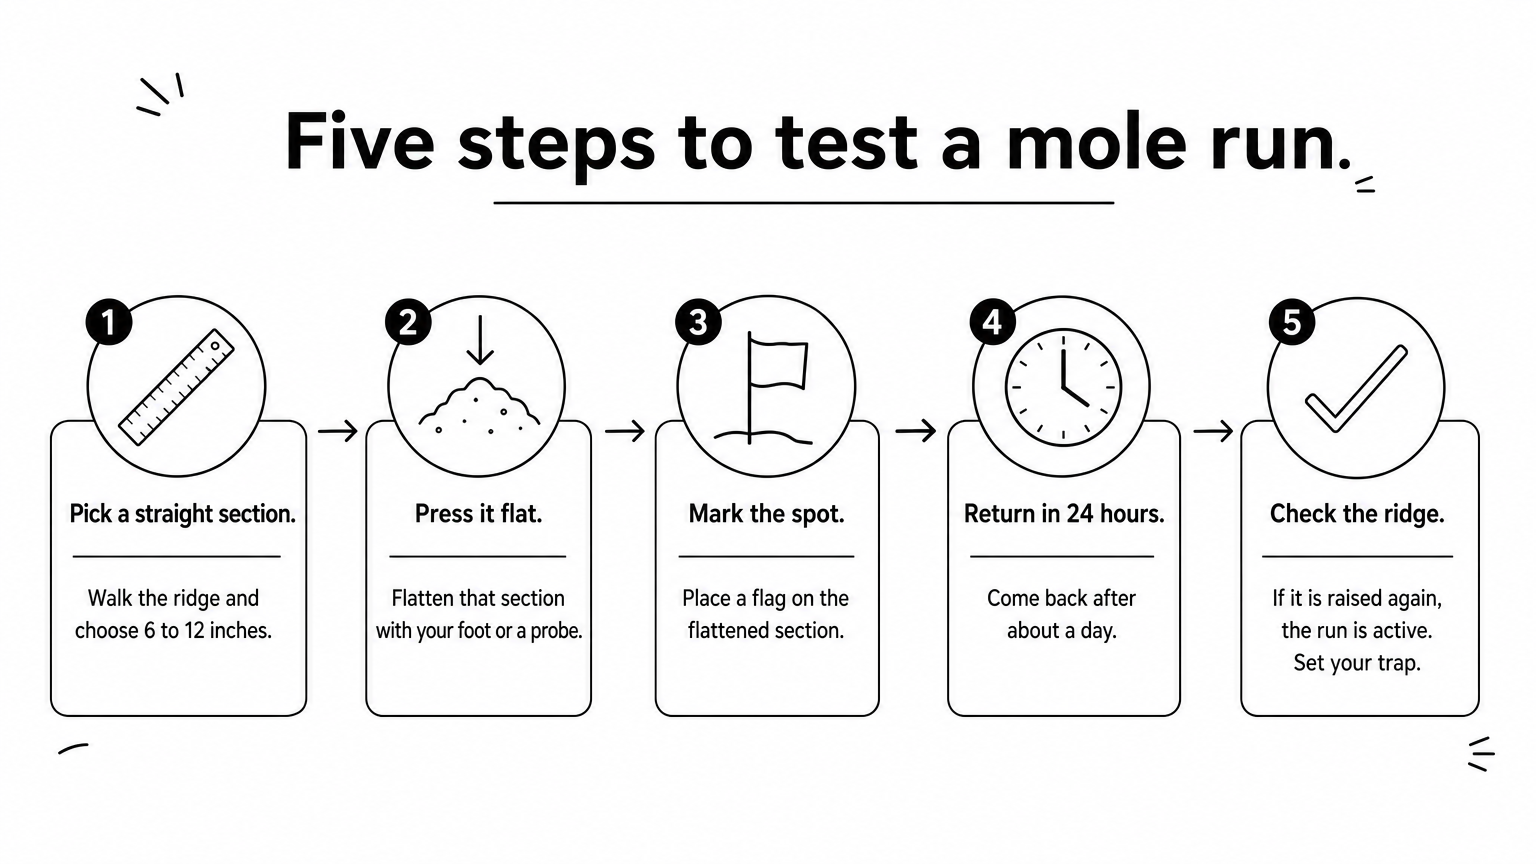
- Walk the ridge and pick a straight section 6 to 12 inches long.
- Press that section flat with your foot or a probe.
- Mark the spot with a flag.
- Return in about 24 hours.
- If the ridge is raised again, the run is active. Set your trap there.
Should you stomp down mole tunnels? Only the one test section. Flattening the whole network does not kill moles, and it hides which runs are live.
A run that stays flat after a day is dead, so move on to the next one.
Step 2. Set the trap in the run
Setting a trap means seating the trigger in the path of the mole and keeping light and loose dirt out of the way. Follow your model's instructions. The sequences below show the common pattern for each type.
Set a scissor trap
Scissor traps set quickly because the jaws go into the run first and you set them in place. The steps are:
- Choose the straightest spot in the run you tested.
- Push the jaws straight down into the run so the tunnel passes between them.
- Press down on top of the trap several times to clear dirt and make room for the jaws.
- With the jaws in the ground, work through the maker's set sequence.
- Check that the trap sits level and the trigger is clear of dirt.
- Flag the trap and cover it.
Some models, like the Victor Out O'Sight, start differently. You open a hole in the run, build a small mound of dirt in its center, and use setting levers. Follow the order in your trap's instructions.
Set a harpoon trap
A harpoon trap sits above the run and drives its spikes down when the mole pushes up on the trigger pan. Placement matters more than force with this trap. The steps are:
- Press a short section of the run flat.
- Seat the base so the spikes are centered over the run and the trigger pan rests on the flattened soil.
- Make sure the trap sits firm and level, because a tilted trap sends the spikes to the side of the tunnel.
- Engage the safety, arm the spring as directed, and keep your hands out of the spike path.
- Release the safety last and step back.
Set a tunnel trap
A tunnel trap works because it hides in the run. The mole walks in and trips it, so the opening has to look like an ordinary tunnel. The steps are:
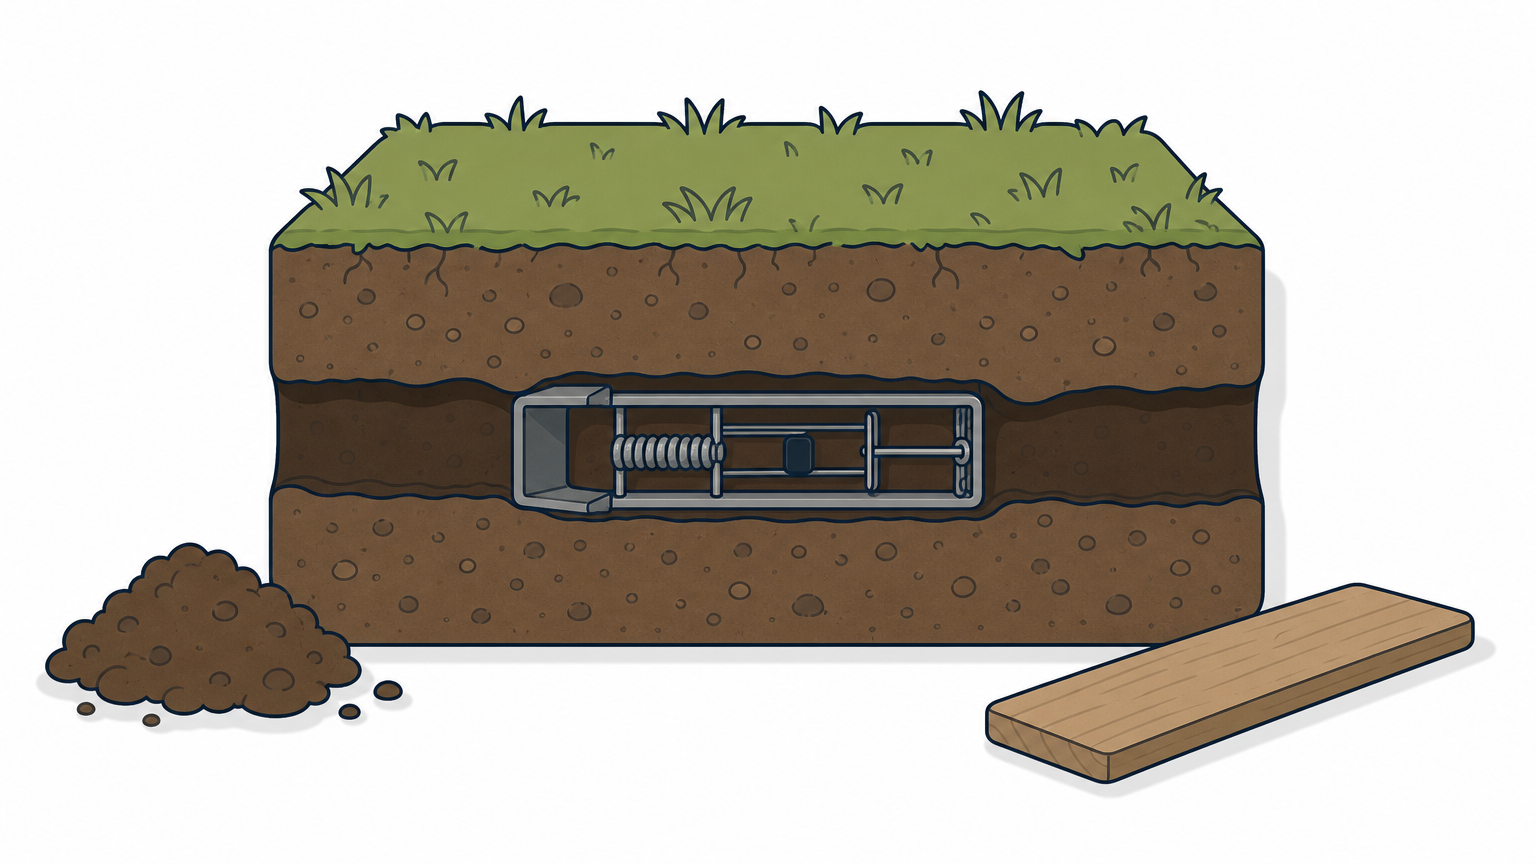
- Cut into the run with a trowel and open a trench as long as the trap.
- Make the trench floor level with the tunnel floor, so the mole walks straight in.
- Slide the trap in line with the tunnel, with both ends flush against the openings.
- Arm the trigger following the maker's steps.
- Block all light with a board or a mound of soil, because moles avoid open tunnels and repair them.
Seat the trigger in the mole's path, then keep light and loose dirt out of the mechanism.
Step 3. Check, reset and move the trap
Check every trap once a day, and move it if it has caught nothing after two to three days. A trap left in the same spot for a week is a trap in the wrong place.
Follow a simple schedule
A rule of thumb for each trap:
- Day 1: Set the trap and cover it.
- Day 2: Check for a catch and make sure the trap is still level and the trigger is clear.
- Day 3: Check again. If the trigger is untouched and the run is not being rebuilt, move the trap to another active run.
Re-run the flatten test before you move it. The mole may have shifted to a different run.
Handle a catch and reset
When you catch a mole, wear gloves and follow your trap's instructions to release it safely. Clear dirt from the jaws, spikes or trigger, then reset the trap in the same run. One catch is often not the last, because other moles use the same runs. Leave a trap in place for several more days after a catch.
At Mole Masters, we cover our devices with hard plastic covers and stake them down. You can copy the idea with a bucket or board, weighted so a mower or a dog cannot move it.
Keep trapping a run after the first catch, because it is often shared.
Step 4. Fix a trap that isn't catching
A trap that misses is almost always in a dead run, sitting crooked, or being avoided by the mole. Work through the likely causes in order before you buy different traps.
Diagnose the miss
Match what you see to the likely cause:
| What you see | Likely cause | Fix |
|---|---|---|
| Trap untouched, tunnel not rebuilt | Run is dead | Re-test and move the trap |
| Trap sprung, no mole | Trigger is off-center or the trap is crooked | Reseat the trap in the middle of the run |
| Soil packed into the jaws or around the trigger | Dirt is blocking the mechanism | Clear it and press the trap down again |
| Mole digs around the trap | Light or human scent | Cover the spot and wear gloves |
| Dry tunnels keep collapsing | Soil is too dry | Irrigate, then set on new activity |
Why isn't your mole trap catching moles? Nine times out of ten it is the first row: the run was dead.
Know when to call a pro
If you have moved traps twice and the lawn is still being torn up, you may be dealing with several moles or a large property. In/Out Mole Control from Mole Masters handles that without poisons or chemicals. It is five weekly visits, priced "Up-To" $395 for a property of half an acre or less, excluding sales tax. The price drops if we can pull out early, and the estimate is free. Larger or harder properties can change the quote, and the office can tell you whether your address is in the service area.
If moved traps still miss, the problem is bigger than one run, and a professional will fix it faster.
Set once, check daily
Good trapping is a loop: find an active run, seat the trap with the trigger in the mole's path, cover it, check it daily, and move it after two or three quiet days. Rain-soaked ground in the Puget Sound region makes the work easier, and the flatten test keeps you from wasting traps on dead tunnels.
If your yard has outgrown a few traps, or you would rather skip the digging, request a free estimate from Mole Masters by form, phone or email. The office is open Monday to Thursday 9am to 5pm and Friday 9am to 3pm.